
Wealthy Affiliate Image Studio: A Practical Guide for Faster, Better Blog Visuals
You finish a solid blog post, hit save, and then the real slowdown starts. You need a featured image, maybe two in-post graphics, and something for Pinterest. Next thing you know, you’ve got 14 tabs open, you’re resizing the same image three times, and you’re still not happy with what you found.
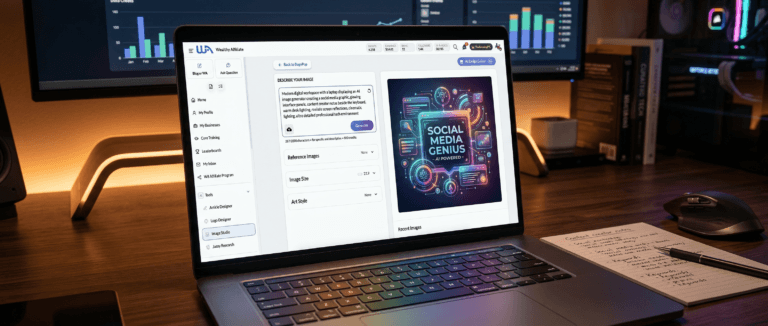
Wealthy Affiliate Image Studio, this AI-powered tool, is built for that exact moment. It lives inside the Wealthy Affiliate dashboard, so you can generate original images from a text prompt (or from an upload), make quick edits, and allows you to move on with publishing.
Set expectations, though. This isn’t trying to be Photoshop for brand teams. It’s a practical, beginner friendly image maker for everyday content. In this guide, you’ll learn what it can create, how it works, how credits affect real use, where it shines, where it doesn’t, and how to use it without getting stuck polishing.
What Wealthy Affiliate Image Studio Actually Is, and What It Can Make for You
Wealthy Affiliate Image Studio is an AI image generator plus a simple editor, built directly into Wealthy Affiliate. That “built-in” part matters more than it sounds. Instead of bouncing between stock photo sites, a background remover, and a design tool, you can create and adjust images right where you already write and manage content.
That’s the main appeal: one place, one workflow. If you publish often, that reduced friction adds up fast. It also helps you avoid the “same stock photo everyone uses” problem. Your images don’t need to look like fine art. They just need to look relevant, clean, and on-brand enough that readers trust the page.
Here are the kinds of visual content people typically make with Wealthy Affiliate Image Studio:
| Visual Content Type | How It’s Commonly Used |
|---|---|
| Blog headers and featured images | Used for blog posts, product reviews, and step-by-step tutorials to give each article a clean visual lead-in. |
| In-post images | Used to break up long sections of text with simple scenes, concept visuals, or product-style images that keep the page easier to read. |
| Pinterest pins and vertical graphics | Used for Pinterest sharing and other vertical placements where tall image formats perform better. |
| YouTube thumbnails and channel visuals | Used to create clickable video thumbnails and simple branded visuals for a YouTube channel. |
| Social media graphics | Used for Instagram, Facebook, and community posts where a quick visual helps content stand out. |
| Banners and promotional images | Used for simple banners, announcements, and basic promotional graphics across websites or social platforms. |
| Simple mockups | Used for visuals such as a product on a desk or a cover-style image for a checklist, guide, or digital freebie. |
 If you’re a newer affiliate marketer, this is often “enough” design power. Not perfect, not fancy, but enough to keep you posting instead of stalling.
The Two Ways to Create Images: Type a Prompt or Start From a Photo
Image Studio gives you two main starting points.
1) Prompt-to-image (the common one).
You describe what you want, choose the format (blog header, square, pin size, thumbnail, custom), and generate options. This works well for general blog visuals, lifestyle scenes, and niche content that needs something fresh.
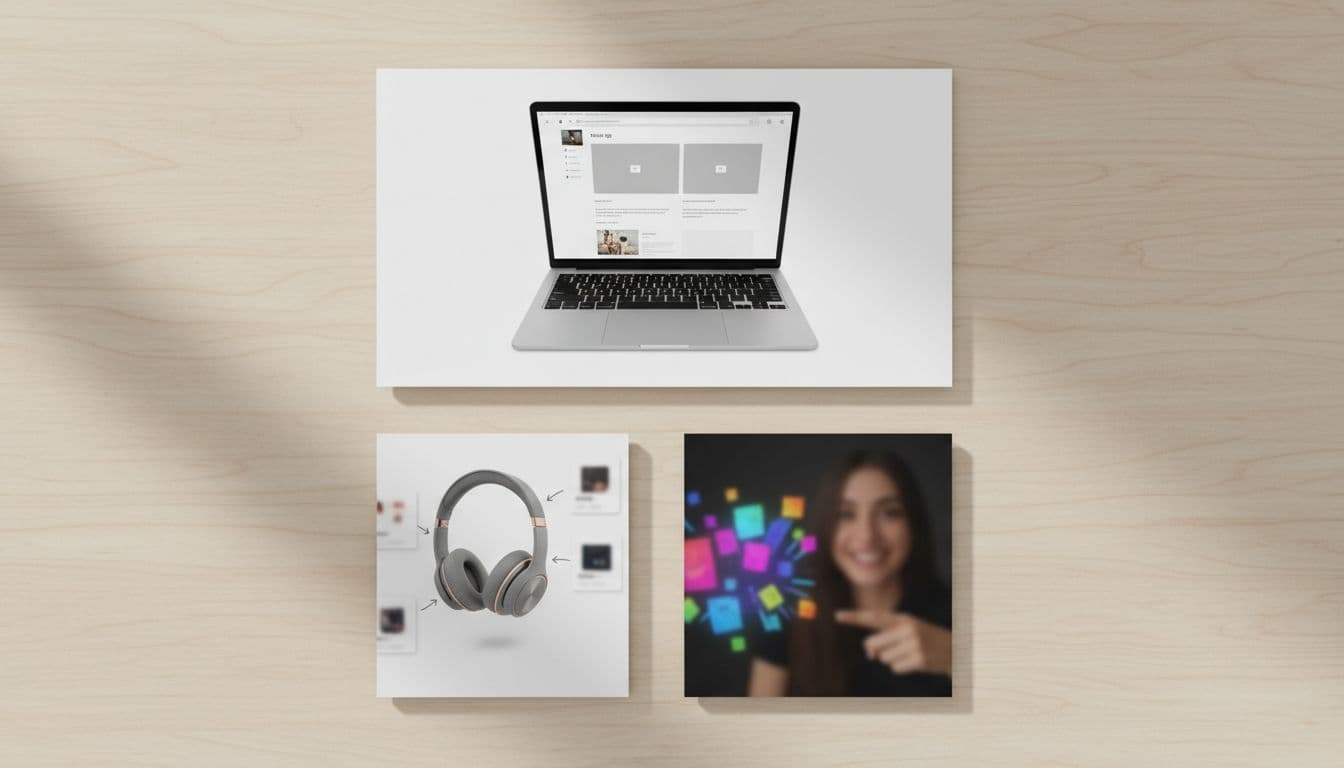
2) Upload a photo and build from it (the underrated one).
You can upload a reference image and create variations, clean it up, or guide the AI toward a similar look. For example, you might start with a product photo, a personal photo you want to adapt into a different setting, or a brand-style image you want to keep consistent.
Recent platform updates in early 2026 focused on stronger context handling and better results with references (including more reliable realistic scenes and characters when you’re trying to keep things consistent). That matters if you’re tired of the AI “forgetting” what you asked for.
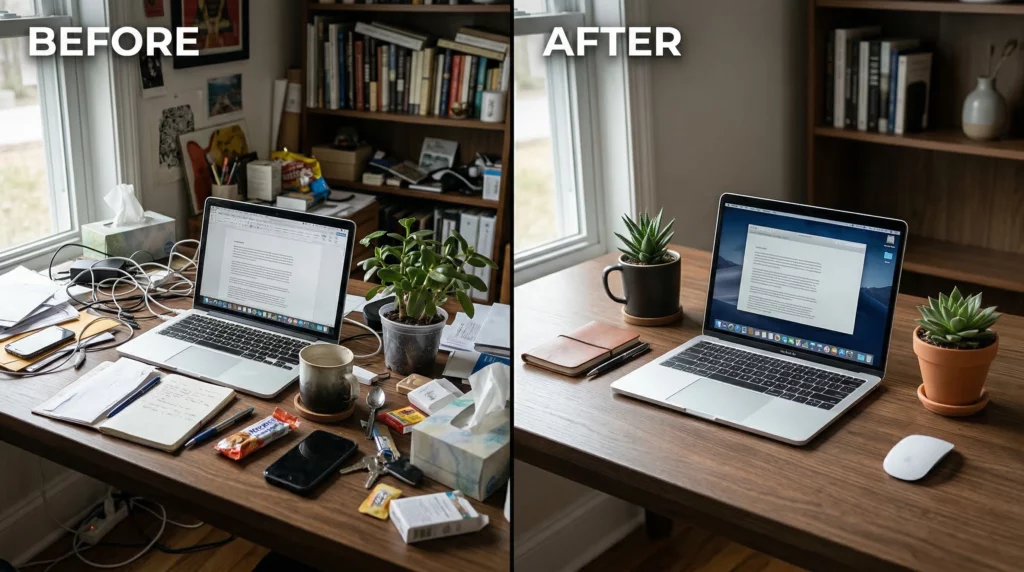
Quick Edits You Will Actually Use (Resize, Background Cleanup, Remove Stuff, Regenerate)
Most beginners don’t need layers, masks, and advanced effects. They need the boring fixes that make an image usable.
Wealthy Affiliate Image Studio’s practical image editing features tend to fall into a few “daily driver” actions:
- Resize and reframe: Fit an image to a blog header, a pin, or a thumbnail without starting over.
- Background removal: Remove distractions, simplify messy scenes, or isolate a main object.
- Erase/remove: Delete a weird object, a cluttered corner, or an awkward detail.
- Expand/crop: Give yourself more space on the sides or change the framing for different platforms.
- Regenerate variations quickly: Keep the same idea, get a few new options, pick the best one.
How to Use Image Studio Without Overthinking It (A Simple Workflow That Stays Fast)
A tool like Wealthy Affiliate Image Studio can either speed you up compared to traditional design software, or it can become another rabbit hole. The difference is having a repeatable process, and giving yourself permission to stop at “good enough.”
Here’s a workflow that stays fast and boosts workflow efficiency while you’re writing a post:
- Decide the job of the image.
Is it a featured header, a step image, a pin, or a thumbnail? Pick one purpose first. - Choose the aspect ratio before you generate.
When you start with the right format, you avoid the annoying resize loop later. - Write one clear prompt, then generate.
Don’t spend 20 minutes writing a prompt like it’s a novel. One to two lines is usually enough. - Pick the best option fast.
If one looks 80 percent right, grab it. You can polish later, or you might not need to. - Make one quick fix.
Cleanup, expand, or remove something distracting. Keep edits simple. - Drop it into your content right away as part of your publishing process.
Seeing the image inside the post helps you decide if it actually works. - Repurpose once (optional, but smart).
Resize the same image into one social version. Then stop.
That last part is important. It’s easy to “keep generating” because it feels productive. Sometimes it is. Other times it’s just hiding from publishing.
A helpful rule is this: if the image supports the post and doesn’t distract, it’s doing its job.
A Prompt Formula That Makes Your Images Look On-Topic (Even if You Feel Awkward Writing Prompts)
Most people feel awkward at first. That’s normal. Prompt writing can feel like talking to a very literal assistant who also happens to be an artist, especially when crafting text prompts.
A simple template that works well is:
Subject + setting + mood/lighting + style + composition note
You don’t have to include every piece every time, but it keeps you from getting vague. Also, if you want to add text later (in a different tool, or wherever you normally add text), ask for empty space. This approach helps generate custom visuals that fit perfectly.
 Here are a few prompts you can borrow and adjust:
- Product review header: “Modern desk scene with a wireless keyboard and coffee mug, clean background, bright natural light, realistic photo style, leave empty space on the left for a title.”
- Comparison post visual: “Two similar travel backpacks side by side on a simple studio background, neutral colors, realistic product photo style, centered composition, no logos.”
- Pinterest pin concept: “Cozy beginner home workout setup with yoga mat and dumbbells in a small living room, warm light, realistic photo style, leave clear space at the top for text.”
Small tip that saves time: if the first result is close but not quite right, tweak one detail only (like “clean background” or “wider framing“) and regenerate. Don’t rewrite everything.
I just wrote an article inside Wealthy Affiliate about a simple but effect prompt I use to create image prompts for any article using ChatGPT and a URL. You can see it here: Simple Image Prompts for Blog Posts Using a Prompt
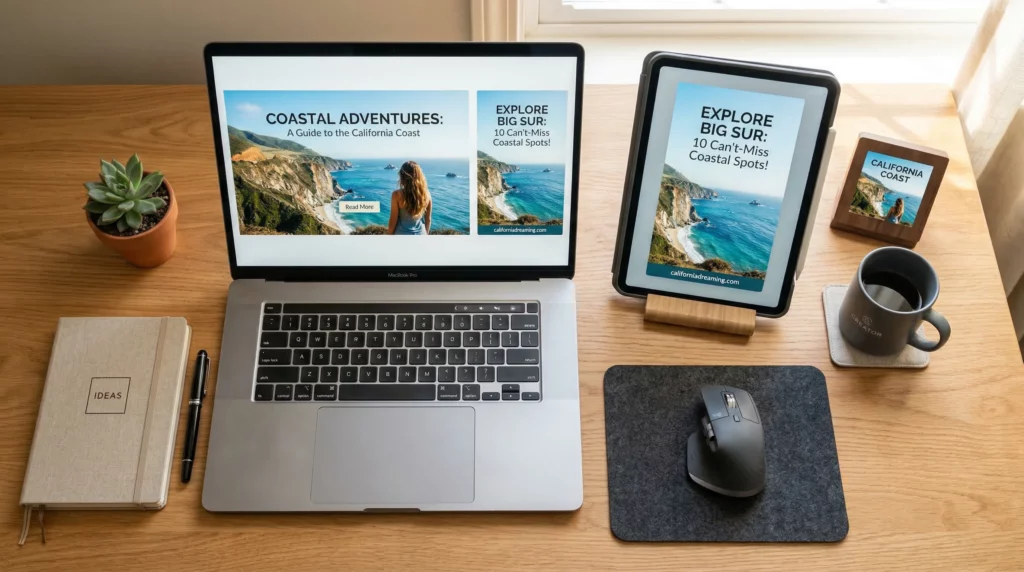
One Image, Many Placements: Turn a Blog Header Into a Pin and a Thumbnail
If you want your site to look more consistent, repurposing is the easiest win. It’s also friendlier on your credits.
Here’s a practical example. Let’s say you publish a post titled “Best Budget Camping Gear for Beginners.” You generate one strong header image that fits the vibe. Instead of generating three different images from scratch, you can:
- Resize it into a vertical Pinterest pin
- Crop it into a square social post
- Adapt it into a thumbnail shape for YouTube or a featured snippet image
The benefit isn’t just time. You start building a recognizable look. Even if your “branding” is basic right now, repetition helps. People notice consistent colors, consistent framing, consistent style choices. It makes your content feel more intentional.
Also, it keeps you from doing the thing we’ve all done, where every post looks like it came from a different website.
Pricing, Credits, and Whether Image Studio Is Worth It for Your Online Business
Image Studio is included with Wealthy Affiliate memberships, so there isn’t a separate subscription just for the image tool. The cost question is really about AI credits and how fast you burn through them.
If you create a few images a week, you’ll probably feel fine. If you publish daily, run multiple sites, or crank out Pinterest pins in batches, you’ll care a lot more.
The other “cost” is attention. Even a good tool can become a distraction if you treat every image like a design contest. So the value comes from using it to keep momentum, not to chase perfect visuals.
How the AI Credits Work Across Wealthy Affiliate Tools (and What an Image Costs)
Wealthy Affiliate, created by Kyle and Carson, uses a shared AI credit system across its AI features. That means image generation pulls from the same pool as other AI tools (like AI writing help and research features). So you don’t want to spend credits like you have unlimited runway, then wonder why you’re out.
Here’s what’s been commonly promoted and reported around March 2026 (always check your own dashboard because offers and numbers can change):
| Item | What it means in real use |
|---|---|
| starter membership | Often includes a small credit amount to test AI tools, and many promos mention 2,000 credits to get started |
| Premium Plus | Includes around 60,000 credits per month as part of the plan |
| Typical image generation | Commonly reported around 500 credits per generated image (this can change with updates) |
| Bonus credits | Sometimes available through promotions or community challenges |
The key takeaway is simple: AI credits are shared, so treat them like a budget.
A few ways to avoid burning credits too fast:
- Generate fewer rounds, pick faster, then edit.
- Start with the right aspect ratio, so you don’t regenerate for sizing.
- Repurpose one base image into multiple formats.
- Batch image work once or twice a week instead of “generate one, tweak one” all day.
Want to Try Image Studio Without Guessing?
Instead of wondering how the credits work, just test it. A free starter account gives you access to Image Studio so you can generate real blog visuals, resize them, and see how far your credits actually go.
Create one blog header. Turn it into a pin. Then decide if it fits your workflow.
No design skills needed. Just start creating and see what works for you.
Who Should Use It, and Who Will Still Want Canva or Photoshop
Image Studio is a strong “yes” for certain people. For others, it’s more like “nice to have.“
It’s a great fit if you’re:
- A beginner affiliate marketer who wants clean visuals without graphic design experience or learning design software
- A blogger who publishes regularly and needs fresh images fast for posts, social media, or e-book covers
- Someone tired of stock photo hunting and the same overused pictures
- A solo site owner who wants everything inside one platform
On the other hand, you might still prefer Canva, Adobe tools, or Photoshop if you’re:
- Doing layer-heavy design work that needs tight control
- Working under a strict brand system with exact spacing, fonts, and reusable templates
- Creating high-end print visuals where details matter a lot
- A design pro who already has a workflow you trust
A practical decision rule (that’s not fancy, but it’s honest) is this: if visuals slow down your publishing, Image Studio is probably worth it. Time saved is real money in affiliate marketing, because content output is what compounds.
Use It to Publish Faster, Not to Chase Perfect
Wealthy Affiliate Image Studio solves a very normal problem in content creation: you want to publish, but images keep dragging you into busywork during the publishing process. By generating and editing visual content inside the same platform, you can make your posts look more personal than generic stock photos, and you can stay in a writing rhythm.
The tradeoffs are also real. Credits can disappear fast if you regenerate nonstop, and advanced design teams will still want pro tools. Still, for most beginners, it is a practical way to keep moving.
Try it on one real project this week: create one blog header, then resize it into one social version. If that feels easier than your current process, you’ve got your answer.
Frequently Asked Questions About Wealthy Affiliate Image Studio
These quick answers cover what Wealthy Affiliate Image Studio does well, how the credit system works, and where it fits into a real content workflow.